

Add an agent on Hyperliquid
When you are done, the agent has two keys:
- Its API key, which it signs every proposal with. Mishmar keeps only the public half.
- A trading key on your Hyperliquid account: a Hyperliquid API wallet that your master wallet approves. Its private key is never whole anywhere. One half lives with the agent’s signer, the other with Mishmar. An order reaches Hyperliquid only when Mishmar’s rules allow it and both halves sign it.
Your master wallet only signs the approval. Its key never leaves your wallet, and the API wallet cannot withdraw.
It takes about five minutes.
What you need
Section titled “What you need”- A Hyperliquid trading account in Mishmar, with the status Active. Trading accounts in the console lists them.
- The browser wallet that holds that account’s master address (Rabby, MetaMask or similar), installed in the browser you use for the console.
- The machine the agent runs on, with the mishmar CLI installed.
- The owner or admin role on the Mishmar account. Approvers and viewers cannot set up agents.
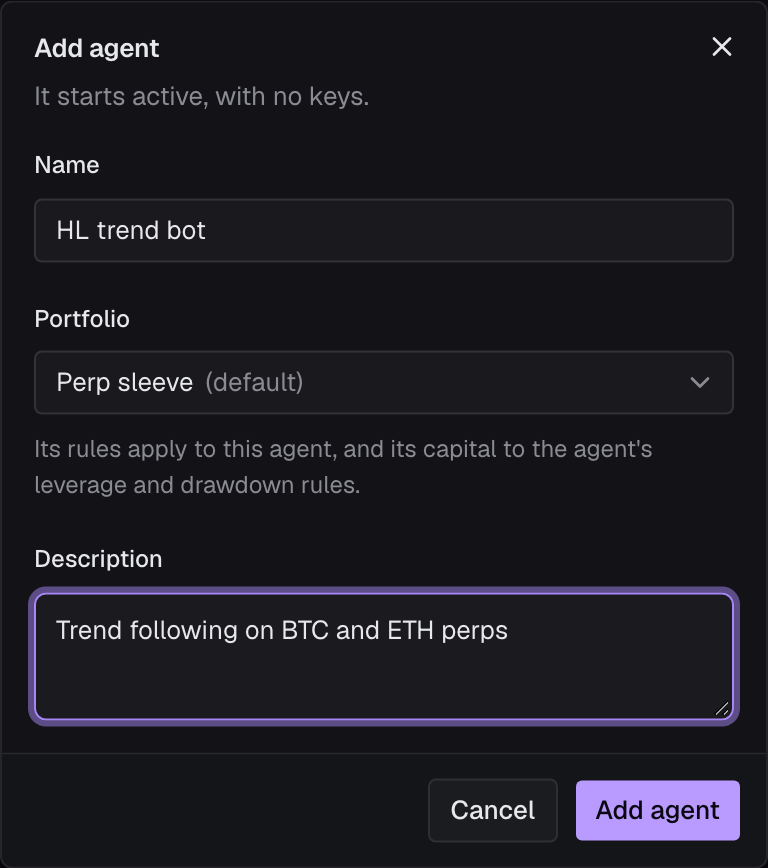
1. Add the agent
Section titled “1. Add the agent”In the console, open Agents and click Add agent.
- Name: what you call the agent everywhere in Mishmar.
- Portfolio: the portfolio’s rules apply to the agent, alongside its own. The account’s default portfolio is preselected.
- Description (optional): what it trades and how.
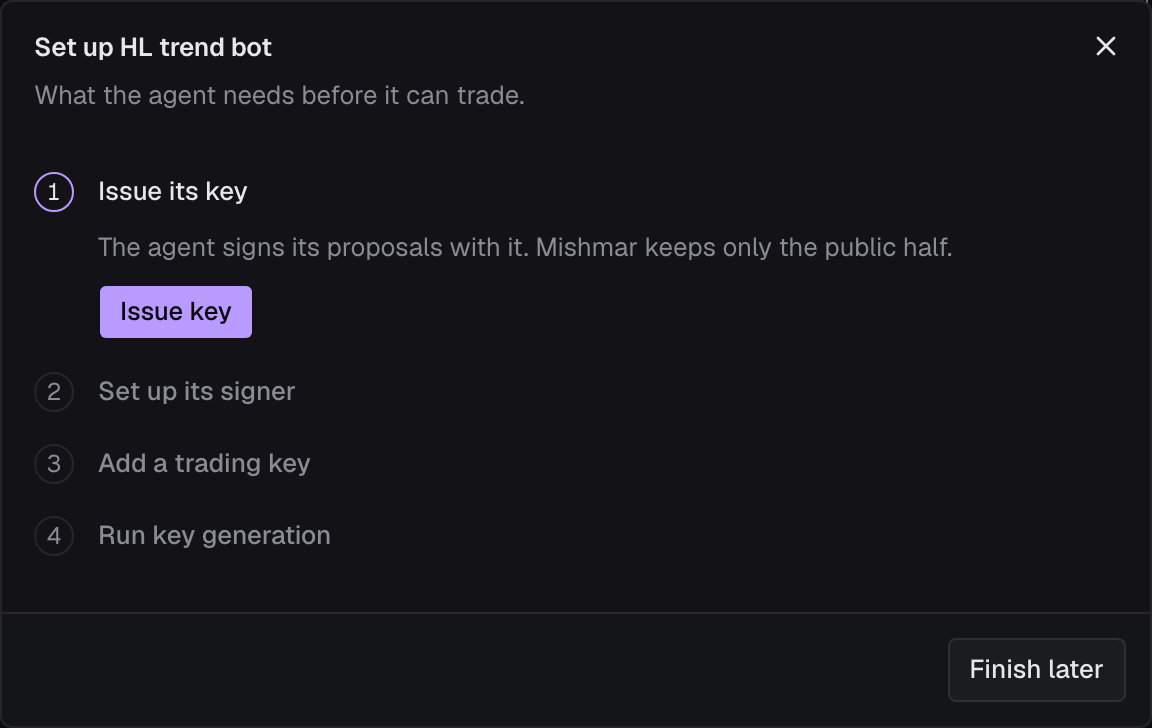
Click Add agent. The agent’s page opens with the Set up dialog, which walks through the next four steps.
2. Issue its API key
Section titled “2. Issue its API key”Click Issue key.
3. Set up the agent’s signer
Section titled “3. Set up the agent’s signer”The dialog shows the key’s secret (it starts with msk_) and a command. The secret is shown once. Copy it before you close the dialog.
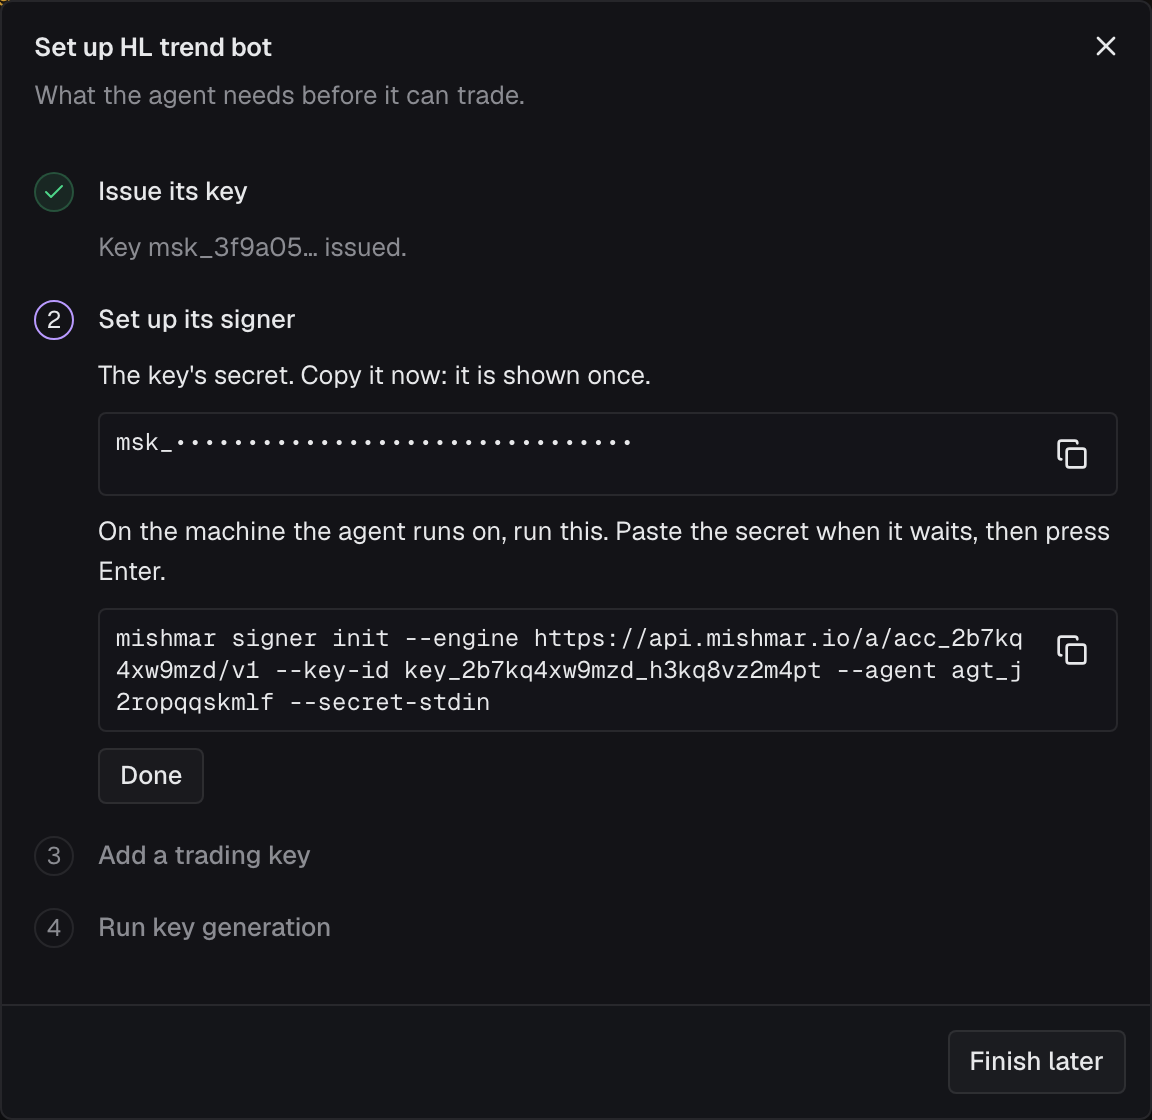
On the agent’s machine, run the command from the dialog. It looks like this, with your own values:
mishmar signer init --engine https://api.mishmar.io/a/acc_…/v1 --key-id key_… --agent agt_… --secret-stdinIt waits for the secret. Paste it and press Enter. The secret is read from standard input, never from the command line, so it stays out of your shell history.
wrote /home/you/.mishmar/agent.json (mode 0600) for agent agt_…, key key_…, engine https://api.mishmar.io/a/acc_…/v1next, one venue key per trading account, made with the engine's signer: …then: mishmar signer runBack in the dialog, click Done.
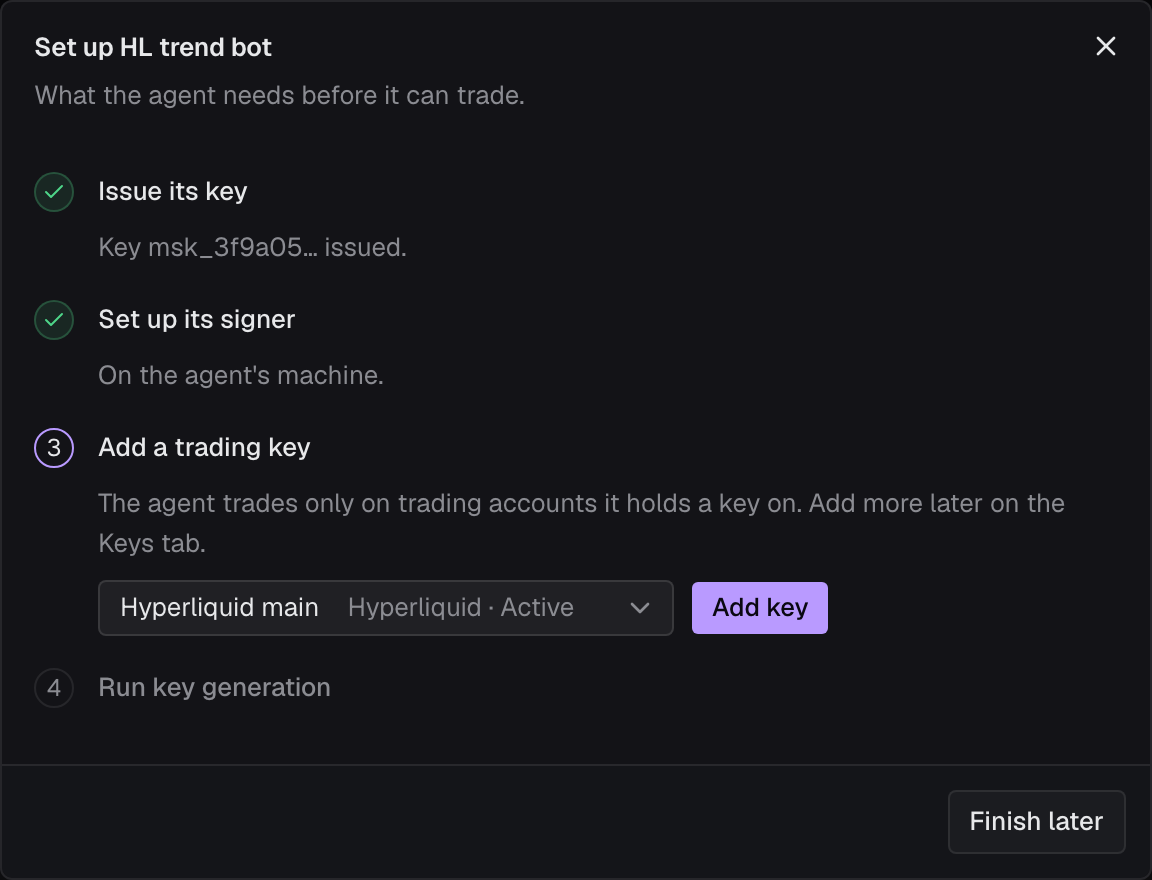
4. Add a trading key
Section titled “4. Add a trading key”Pick your Hyperliquid trading account and click Add key. The list shows only trading accounts where this agent has no key yet.
5. Make the key on the agent’s machine
Section titled “5. Make the key on the agent’s machine”The dialog shows a second command. Run it on the agent’s machine:
mishmar signer keygen --venue-key vk_… --trading-account ta_… --venue hyperliquid --network mainnetThe console fills in --network from the trading account (testnet for a testnet account). Add --config if you used one in step 3.
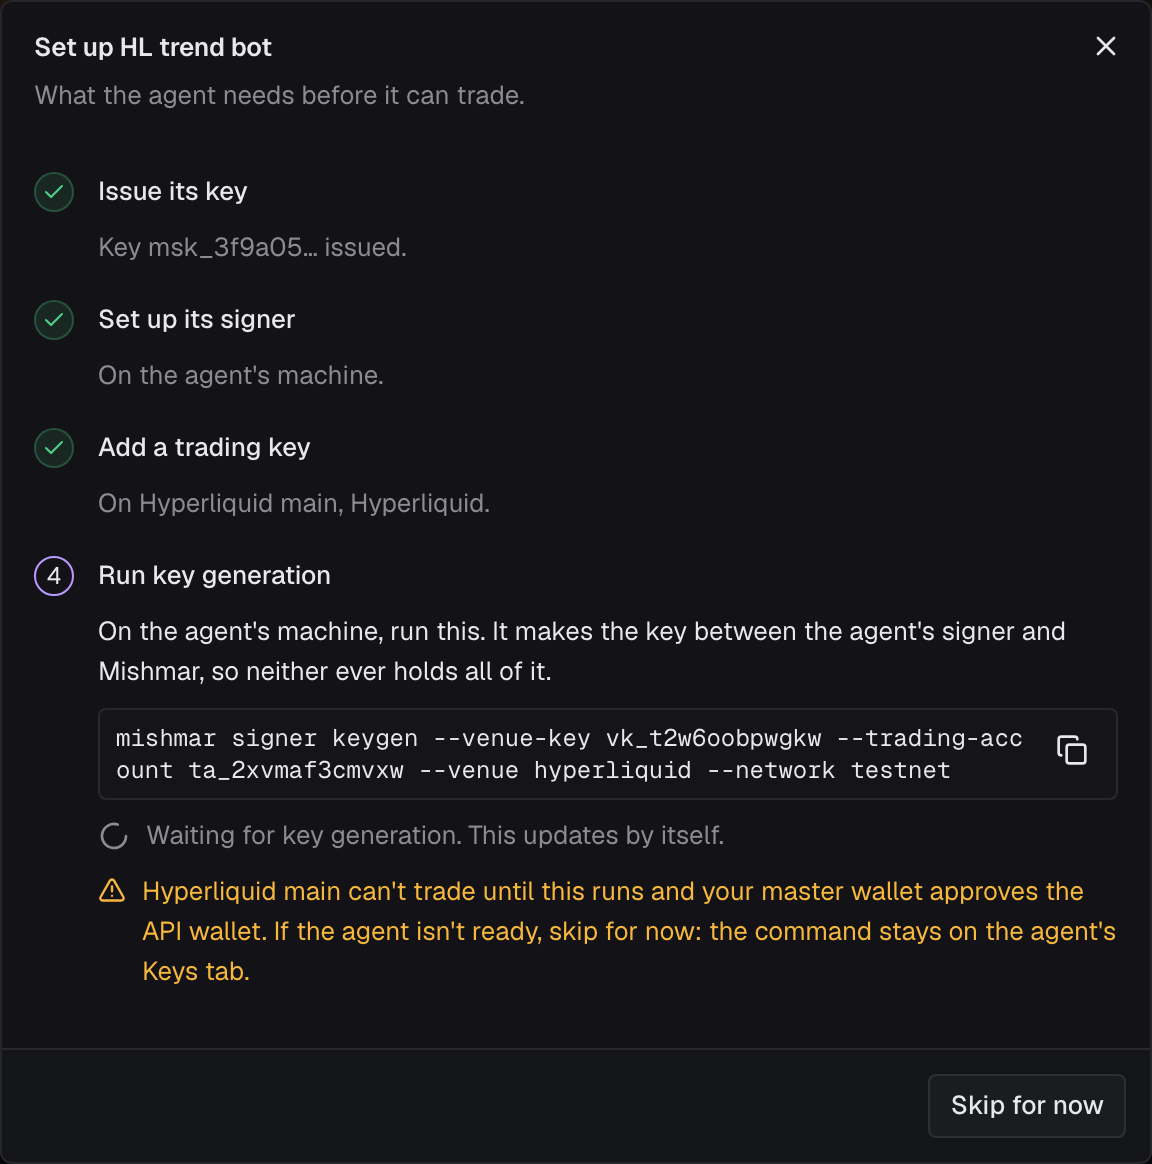
The agent’s signer and Mishmar’s signer each generate a half and run two rounds together. Neither ever sees the other’s half. What comes out is an ordinary Hyperliquid address, the API wallet, whose private key exists only as the two halves.
generated the agent's key for vk_… (hyperliquid mainnet, trading account ta_…) in /home/you/.mishmar/agent.json approve the API wallet 0x… from the master wallet in the console, then verify the key.The dialog notices by itself and shows the API wallet’s address.
If the agent’s machine isn’t ready yet, click Skip for now. The command stays on the agent’s Keys tab, and the agent cannot trade on this account until it has run and the API wallet is approved.
6. Approve the API wallet with your master wallet
Section titled “6. Approve the API wallet with your master wallet”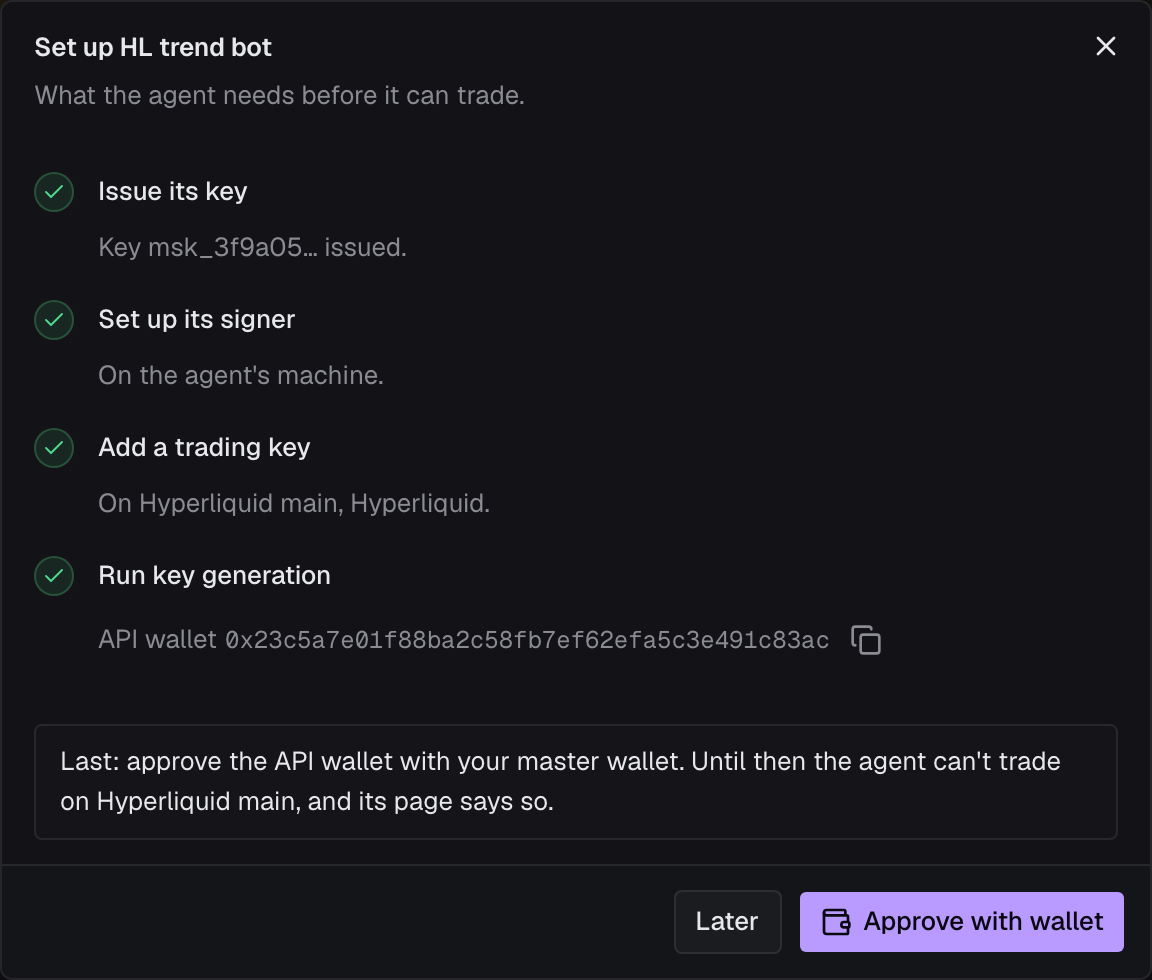
Click Approve with wallet, then Approve with wallet again in the panel that opens. The console then:
- Connects to your browser wallet.
- Checks that the connected address is the trading account’s master address.
- Gets the approval message from Mishmar.
- Asks your wallet to sign it.
- Sends the signature to Hyperliquid.
Your wallet shows a typed-data signature request from Hyperliquid (HyperliquidTransaction:ApproveAgent). Before you sign, check two fields:
agentAddressis the API wallet address the console showed.hyperliquidChainisMainnet, orTestnetfor a testnet account.
The agent name is mishmar- followed by the last eight characters of the agent’s id, then valid_until and the moment the key expires, in milliseconds: Hyperliquid drops the API wallet when Mishmar does, 100 days out. The agent’s next API wallet gets the same name, so approving it takes over this one’s slot instead of using another of the three. You do not need to switch networks in the wallet: the message is signed for the chain the wallet is on.
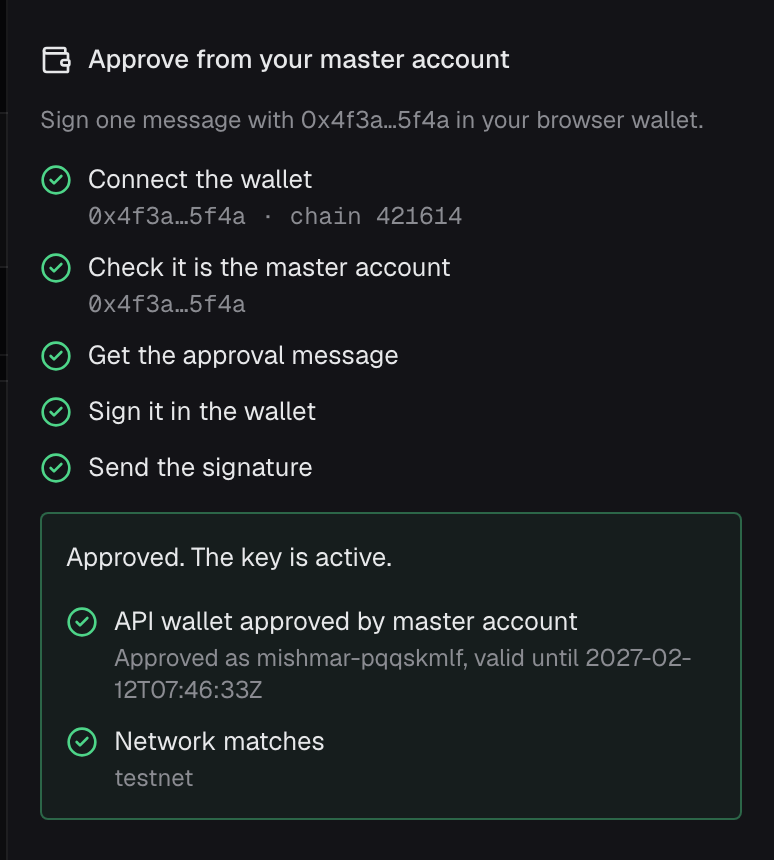
When the panel says Approved. The key is active., the agent can trade on this account. If it says Verify the key to activate it, open the agent’s Keys tab, click ⋯ on the key’s row and choose Verify.
You can also approve later. Until you do, the agent’s page and its row in Agents show API wallet not approved, with an Approve with wallet button.
7. Run the signer and place a test order
Section titled “7. Run the signer and place a test order”On the agent’s machine, start the signer and leave it running:
mishmar signer runIt signs only orders this agent proposed and Mishmar allowed. Orders that wait for your approval need it running, because their second signature comes later.
In a second terminal, propose a small limit buy far below the market, so it rests on the book and does not fill. Use your trading account’s id (ta_…, on its page in the console):
mishmar propose --config ~/.mishmar/agent.json --trading-account ta_… --symbol BTC --side buy --size 0.0003 --price 50000The output looks something like this. Your rules and numbers will differ.
decision dec_…: allow buy 0.0003 BTC on hyperliquid, notional 15, latency 2.10 ms, revision 12 passed Max order size order_size observed 15, limit 150 signing: signed (one-shot: the agent's half came with the proposal) venue: resting order 64462809897 at 2026-11-04T10:20:31ZThe order is on Hyperliquid’s book, and the decision is on the console’s Decisions page. To pull it, copy its Client order id (msh-…) from the decision’s page and run:
mishmar propose --config ~/.mishmar/agent.json --trading-account ta_… --symbol BTC --cancel msh-…Hyperliquid refuses orders worth less than $10. If BTC trades below $50,000, lower the price so the order still rests.
From your agent’s code
Section titled “From your agent’s code”The Python and TypeScript SDKs start the signer for you as a child process, with the same config file. The bot itself never holds a key. Only one signer runs per config file, so stop the mishmar signer run from above first.
from mishmar import Signer
with Signer() as s:  # ~/.mishmar/agent.json, or Signer("path/to/config.json")    d = s.order("ta_…", "BTC", "buy", "0.0003", price="50000")    if d["verdict"] == "require_approval":        d = s.wait(d["id"])
For an LLM agent, mishmar mcp serves the same actions as MCP tools. The repository’s README covers both.
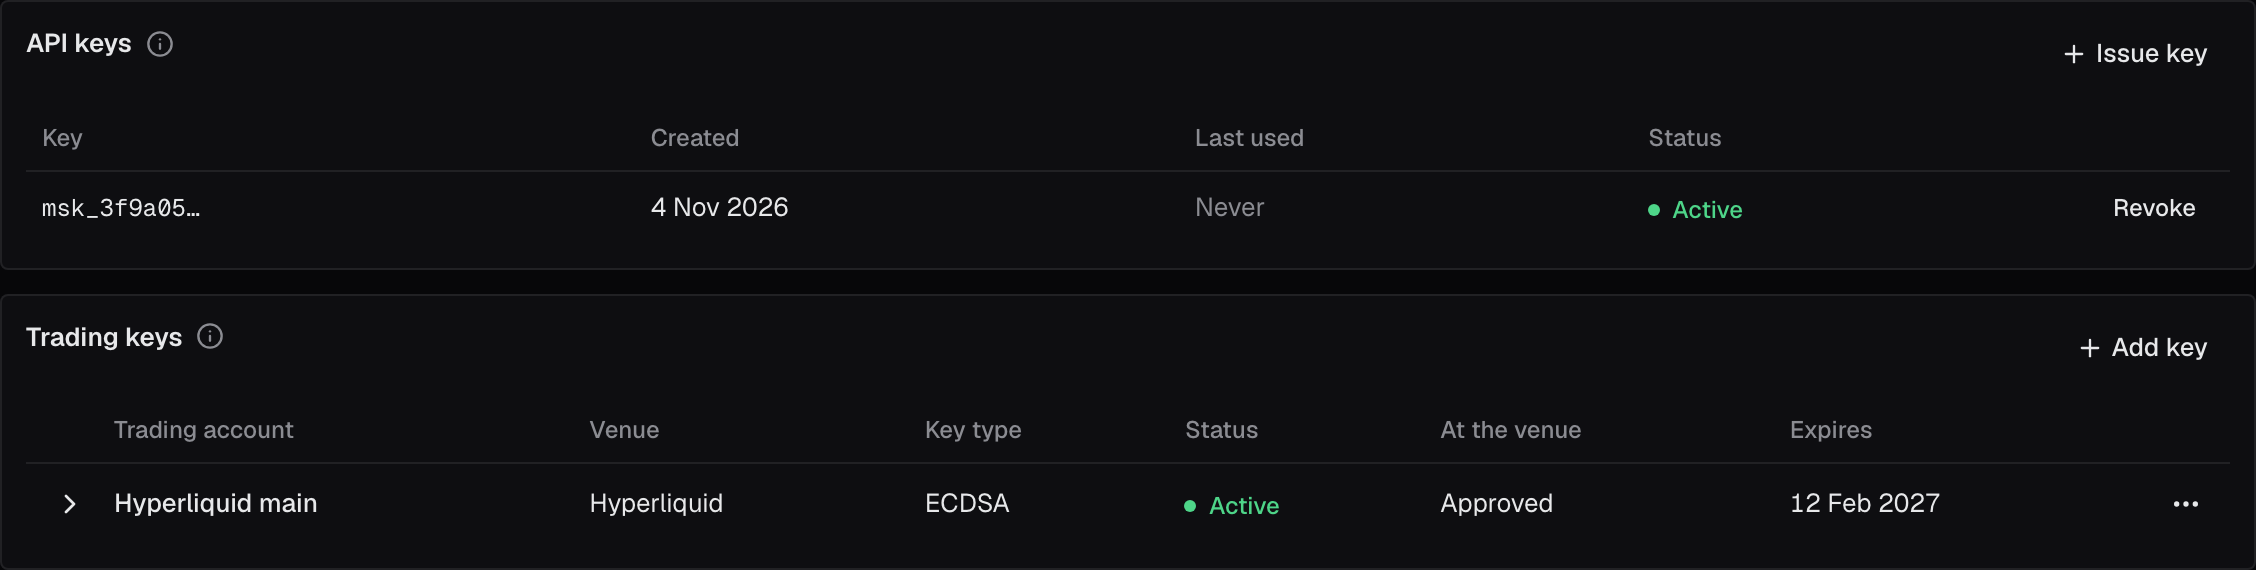
Check it worked
Section titled “Check it worked”- The agent’s page shows no Setup isn’t finished and no API wallet not approved warning.
- On the agent’s Keys tab, API keys lists the
msk_…key as Active, and Trading keys lists the Hyperliquid trading account as Active, Approved under At the venue, and the date the key expires under Expires. - On Hyperliquid, the API page (app.hyperliquid.xyz/API, or app.hyperliquid-testnet.xyz/API on testnet) lists the API wallet under the name
mishmar-….
When something goes wrong
Section titled “When something goes wrong”… exists already; add venue keys to it with "mishmar signer keygen", or pass --config for another file: the machine already has an agent’s config. Give this agent its own file with--config, as in step 3.- The secret is lost before
signer initran. On the Keys tab, revoke the key under API keys, then Issue key again. --network is required for a Hyperliquid key: mainnet | testnet: copy the whole command from the dialog. It carries every flag.- Key generation stopped partway (the network dropped, the machine slept). The key still shows Key generation pending. Run the same
mishmar signer keygencommand again. - The approval fails at “Check it is the master account”. The wallet is on a different address. Switch to the master address in the wallet and click Try again.
- No browser wallet found. Install Rabby or MetaMask in this browser with the master account, then reload the page.
a signer is running with … : restart it so it uses the new key: you added a key while the agent’s signer was running. Stop it and start it again.- An order comes back with
signing: unreachable. The order needed the signer and none was running. Startmishmar signer run(or the SDK’sSigner) and propose again. Agent …'s key on trading account … has expired; give the agent a new key: see When the key expires.The account's plan holds 1 agent; delete one or move to a larger plan, or the same for a trading account. The free plan holds one agent and one trading account, and Add agent is greyed out with the reason beside it. Delete one, or move to a larger plan.- An order comes back
rate_limited:The account's request budget for hyperliquid is spent for now; send it again in … s. Each plan has a share of what Hyperliquid lets one address send. The SDKs andmishmar signer runsend the order again after the wait. Closing positions and cancels always go. - The trading account says New orders are blocked: Mishmar has lost the venue’s stream of this account’s fills and orders. While Mishmar can’t see the account’s fills and orders, it blocks new risk. Closing positions still works. Trading starts again by itself once the stream is back; if it hasn’t within a few minutes, tell us.
When the key expires
Section titled “When the key expires”Every trading key expires 100 days after it became active, on every venue. The date is under Expires on the agent’s Keys tab. In the key’s last week the date turns amber, the agent’s page and its row in Agents warn, and Mishmar emails the account’s owner and admins 7, 2 and 1 days before. Once the date passes, the key is Expired: Mishmar never signs with it again, and the agent can’t trade on this account. Hyperliquid drops the API wallet at the same moment, since the approval named the date.
Replace the key before then:
- On the agent’s page, click Replace key, in the warning or under ⋯ on the key’s row.
- Click Add new key. The current key keeps working.
- On the agent’s machine, run the
mishmar signer keygencommand the dialog shows. If the agent’s signer is running, restart it so it has the new key. - Click Approve with wallet and approve the new API wallet as in step 6.
The moment the new key is active, Mishmar revokes the old one, and the agent trades on through the change. An order the agent built with the old key in the seconds after can be refused; propose it again.
If the key has already expired, the warning offers Make a new key, with the same steps. The agent can’t trade on this account until the new key is active.
A new key always means a new API wallet. Hyperliquid strongly advises against approving an API wallet’s address again: once a wallet expires its nonce history may be pruned, and orders it signed earlier could then be replayed. Mishmar refuses to approve a key a second time.
Taking the key away
Section titled “Taking the key away”On the agent’s Keys tab, click ⋯ on the trading key’s row and choose Revoke. Mishmar stops signing with it at once, and without Mishmar’s half the API wallet can sign nothing. Hyperliquid keeps listing it until its approval runs out.